
So, You want to start a programming blog?
Starting a blog is good if you want to take it for the long term and see it as a source of passive income.
I have been blogging for the last 6 years and have seen so much good and bad in the blogging business.
Blogging is one of the best options to turn your passion into profit.
Starting a programming blog in 2024 is not tough if you get proper guidance. So let’s dive into the step-by-step guide.
Table of Contents
- How to Start a Programming Blog
- Step 1: Select a Perfect Niche for Your Blog
- Step 2: Choose a Blogging Platform
- Step 3: Pick a domain name
- Step 4: Get a Web Hosting Account
- Step 5: Set Up Your WordPress Blog
- Step 6: Select a WordPress Theme to Design your Blog
- Step 7: Get Some Must-have WordPress Plugins (Useful Resources for blogging).
- Step 8: Optimize your WordPress blog
- Step 9: Write Content and Promote your Blog
- Step 10: Make Money Blogging
How to Start a Programming Blog
Step #1: Select a perfect niche for your blog
Step #2: Choose a blogging platform
Step #3: Pick a domain name
Step #4: Get a web hosting account
Step #5: Set Up your WordPress Blog
Step #6: Select a WordPress theme to Design your blog
Step #7: Get some must-have WordPress plugins (Useful resources for blogging).
Step #8: Optimize your WordPress blog
Step #9: Write content and promote your blog
Step #10: Make money blogging
Step 1: Select a Perfect Niche for Your Blog
Do you know what is the first step of creating a successful blog?
The first step is to choose a profitable niche for your blog.
if you are new to blogging then maybe you are not familiar with words niche so let’s understand niche first.
In simple words, we can say niche is the topic of your blog.
Most bloggers failed to build a blog successfully because of choosing the wrong niche or not sticking to a niche.
Bloggers do these common mistakes while writing a blog post, they change the blog niche while their blogging journey.
Why blogging niche is so important?
- If you have a blog in a particular niche then readers and search engine both treat you as an expert in that field.
- When you blog for a specific niche then it helps you to attract a targeted audience. The targeted audience is those readers who will come back to your blog in the hope of getting new valuable content because they feel that your content is highly relevant to them.
- When you have a targeted audience then you can easily promote the products and services in which they are interested.
- When you do niche blogging you get recurring traffic because readers who visit your blog and loved your content revisit to know about other latest information related to the same category.
These are the main benefits of having a niche for your blog. So, if you are blogging to make money or seeing it as a career then you must choose the niche of your blog.
So hope you have understood why you should decide on your blog niche. Now you must have a question in your mind how can I choose the perfect niche for my programming blog?
Here I am going to share some amazing tips which will help you to choose the perfect niche for your blog.
How to Choose a Niche for Your blog?
A blog niche is a topic you write about on your blog.
Most bloggers suggest choosing the niche in which you are interested and that is right but there are so many other things that should be considered while choosing a blog niche.
Making a successful blog is all about choosing a profitable niche.
So, here I am going to share some important tips to follow that help you in selecting the perfect niche.
# Select the topic in which you are interested in.
When you have to speak on favorite topic then you can easily speak for an hour or more. What does it mean?
It means that your favorite subject or topic is easy for your and becomes easy while speaking and writing about it.
When you choose a niche or topic in which you have an interest then you can easily read more about it and also write more.
So always choose a topic about which you like to talk more and be passionate about so that you can write very well about it.
# Check if other people wants to read about this topic
While choosing your blog niche, you should also see how many people are interested in your niche. You have followed the first tips and found your interesting topic. In this step, you must check if there are other people who are interested in reading about this topic.
You can’t find the statistics directly so you can take the help of google trends and read some blogs related to your interest.
Do market research so that you can be aware of how many maximum readers you can get to your blog.
When you are deciding blog niche, you should also know the details of the targeted audience.
#Check whether you can make money from the topic or not.
If you are going to select a niche you must check whether it is profitable or not. After all, you are going to do blogging to make passive income. So, you must do research to know what topic you are going to choose is good in the sense of income.
#Check the future scope of the topic
The topic you are going to select for your blog should have a future scope, meaning it will be of interest to people for the long term.
You are going to blog, then you must want to get audience for your blog but getting audience for short period of time is not beneficial as getting it for long term.
You should select a topic which people will love to read about in feature to make money blogging.
Step 2: Choose a Blogging Platform
Hope you have decided your niche. Now you have to choose great blogging platform to setup your blog.
Choosing a blogging platform is a tough task because there are several different blogging platforms are available.
You might have heard about WordPress. It is one of the biggest blogging platform in the world with amazing list of plugins and addons to customize blog.
There are more than 70+ millions of active users.
All pro bloggers are using this platform for their blog.
There are so many other blogging platforms available.
Blogger – The next best platform after WordPress.
Tumblr – This is a type of social media site and it also feature to create blogs.
But I will recommend you to go with WordPress.org.
Why ?
These are the reasons why you should go with WordPress.
- Very easy to set-up and is free to use platform.
- WordPress gives you control over every aspect of your blog.
- There are tons of free themes available for WordPress platform. This allows you to create a beautiful website that stands apart from the crowd.
- You can get access to 55000+ free plugins . These plugins helps you to add extra feature to your blog at no cost like contact form, gallery, widget, social share button etc.
- WordPress is search engine friendly platform. You get some awesome free SEO plugins and it helps you in search engine optimization of your blog.
WordPress have 2 options : WordPress.org that is call self hosted and other is WordPress.com.
All the features you have read above are of WordPress.org.
The main difference between WordPress.org and WordPress.com is who is hosting your website.
WordPress.org is where you can download the WordPress software to use it on your own web hosting. In this, you host your own website or blog.(we highly recommend this one).
WordPress.com is a hosted service where you can set up your blog and start on WordPress. WordPress.com take care of hosting your website and all.
So, Hosting company like Bluehost, A2Hosting, or SiteGround are easy to start with WordPress.com.
Step 3: Pick a domain name
A domain name is the name of your blog.
Let’s understand with an example.
Google.com, Godaddy.com , yahoo.com are the name of websites and it is called a domain name.
Domain name is the identity of your blog. Anyone can visit your blog website by typing your domain name in browser same as you do to visit any site.
Hope you got what the domain name is.
So, there are so many domain name provider companies available in the industry.
Here are my recommended domain name registrars:
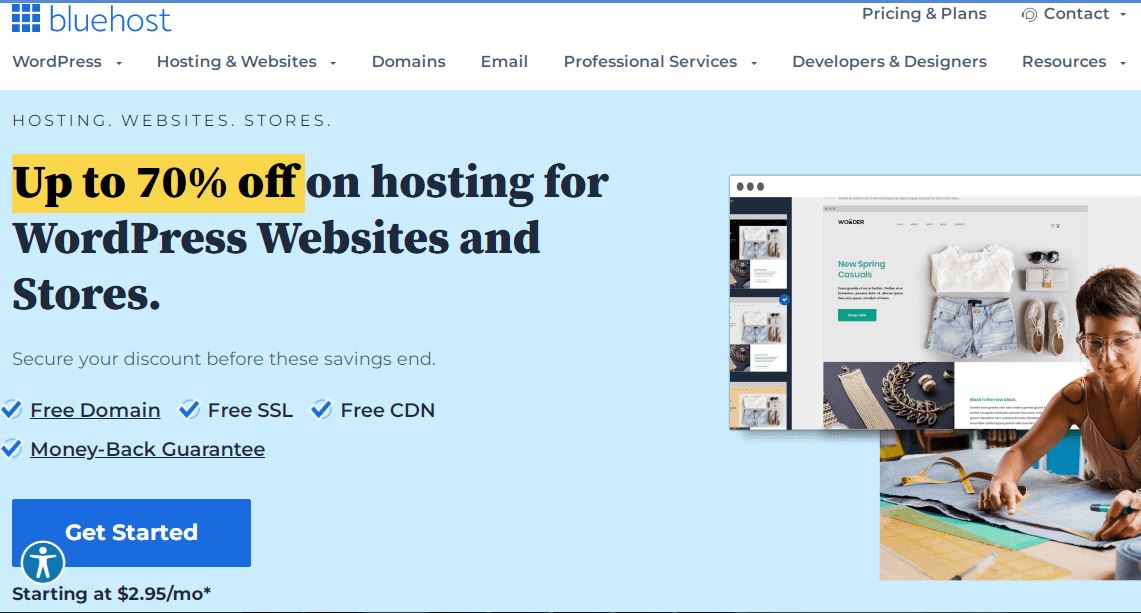
Bluehost:
You get a free domain name for 1 year when you sign up for web hosting.
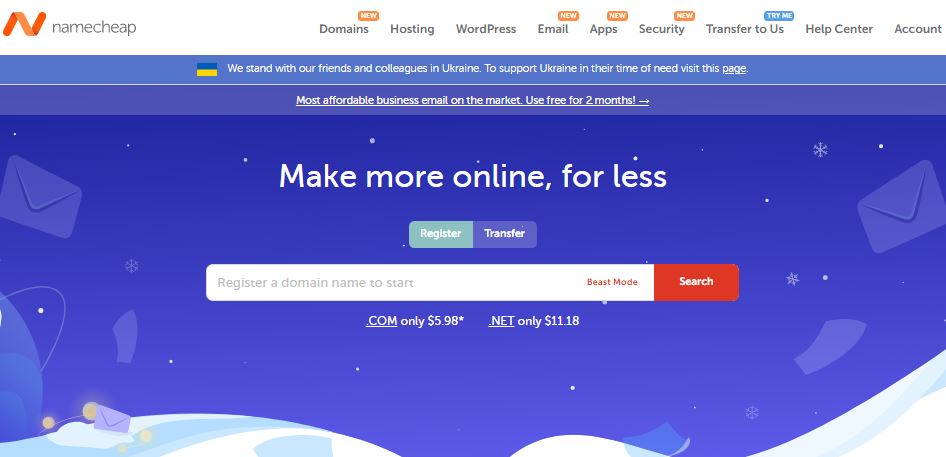
Namecheap:
Namecheap is at the top from where you can buy a domain name for your blog. Popular provider because they offer domains at very affordable prices.
So, you will have to visit any above domain name providers to register your domain name.
I am going to show you an example with Godaddy.com.
I searched Bloggingity.com in Godaddy and it was available. Then how I registered is going to show you step by step.
Let’s see how you can also register a domain name with Godaddy.
Points to keep in mind before buying domain names
Try Short Name
Always Prefer Dot Com
Find a name related to your Industry
Step 4: Get a Web Hosting Account
You have registered your domain name.
A website or blog is a collection of text, files, images, and videos, etc. So, the question is where you will store it online.
Here comes the role of web hosting.
You need an online space called web hosting that will help you to store your blog files and images.
Web hosting is an online space that will help you to store your blog text, files, images, and videos.
A domain name is the name of your blog and all the data of your blog will be stored on the server called web hosting.
So, you have to buy hosting to store your website data.
Now you are thinking about which hosting is best for you.
There are so many web hosting providers available but you should choose which has the best service and great support.
so, here I am going to recommend the BlueHost?
Now the question is why Bluehost?
Take a look to know I am recommending Bluehost.
- Free Domain for 1 Year
- Free SSL Certificates
- Access to SSD Storage (which can ultimately improve your site loading times)
- Unlimited Parked Domains (including Subdomains)
- CGI, PHP, Ruby (RoR), Perl, PHP Nuke, MySQL
- Access to a variety of database types, including MySQL, PostgreSQL, SQL Server, and more
- One-click WordPress Install
- 24/7 WordPress hosting support
- Access to a ton of WordPress themes (free and premium collection)
- Access to cPanel where you can manage all your files, databases, emails at one place
- All of the WordPress Hosting packages from Bluehost come with the advanced cPanel, Sitelock CDN, SiteLock Pro security features and so on
Whether you know it or not, Bluehost is a web host recommended by WordPress itself for hosting blogs.
Here is a simple guide on how you can get WordPress hosting from Bluehost.
Step 1: Click on this link to start your WordPress blog on Bluehost
Step 2: In this step, Go to the navigation menu > click on WordPress > Choose WordPress Hosting
Step 3: Now choose any plan which suits your needs and budget.
Step 4: Now you will get an option to choose a domain name (Bluehost provides a domain names for free, you can also enter the domain name you already have)
Step 5: Enter Account information such as name, email, etc.
Step 6: Complete the payment process and you are done.
So, you have bought web hosting on Bluehost for your blog.
Step 5: Set Up Your WordPress Blog
Now you have owned your domain name(website name) and web hosting to store your website data online.
In this step, You have to install and set up WordPress CMS on web hosting.
CMS is known as a Content Management System which allows you to add or manage content on your blog.
I am also using WordPress for this blog and it is very easy to use.
Now, this is the main step where you actually start a WordPress blog on Bluehost.
Bluehost offers a free and one-click WordPress install feature. By clicking on install, Bluehost will automatically install WordPress for your blog.
Step 6: Select a WordPress Theme to Design your Blog
After completing the setup process, write your blog URL in your browser address bar.
eg.
http://www.domainname.com/wp-admin
It will show you a login form, where you have to enter your username and password which you have set during the installation process.
After logged in to WordPress dashboard, you can install and activate your favourite theme to design your blog.
Step 7: Get Some Must-have WordPress Plugins (Useful Resources for blogging).
Without adding plugins to WordPress, you are not going to customize and add extra amazing features to your blog.
Plugins are essential for SEO, optimize your blog content, speed, backup and for so many more things.
There are tons of plugins available for WordPress but I am going to suggest which are useful and will help you to scale your blog to the next level.
So, here is the list of awesome plugins i like to recommend for blog.
Elementor or Thrive Architect: These are the page builder plugin that allows you to design and customize any page or post. With the help of
this plugin you can create awesome landing page or blog post with just drag and drop.
Yoast SEO: SEO is very very important to rank your website and gets a lot of traffic from Search Engine(organic traffic). It help you
to optimize your blog for search engine.
WP Rocket: Now a days speed of website is one of the important factors to rank in Search engines. WP rocket is a plugin that helps you
to optimize your site and make it faster.
Thrive Leads: If you want to collect emails from your blog readers then you can try to thrive leads. It helps you to create different types of forms such as Popup Lightbox, Sticky ribbon/notification bar, In-line forms inside your content, 2-step opt-in forms where visitors click a button to display the form (great for conversion rates!), Slide-in forms (great if you want something a little less aggressive than a popup) , Opt-in widget , Screen filler overlay , Content locker , Scroll mat and more
UpdraftPlus: Backup of a website is always necessary and we must take it on priority. This plugin allows to take daily backup of your website and keeps your blog in safe.
Social Snap Pro: It is a social sharing plugin . Apart from this feature, it also helps to drive traffic from different social networks.
If you don’t know how to install plugin in WordPress? Here is the simple guide for you
How to Install a WordPress Plugin
Login to your WordPress dashboard
Then go to Plugins > Add New
Then upload your plugin zip file or search from plugin list if it is free and click on the install now button.
After installing, click on the activate button to activate that particular plugin.
Now plugin is installed and activated successfully.
Step 8: Optimize your WordPress blog
Delete Default Data(Post, Page, and Comment): When you go to page section you will see dummy page, you have to delete this one. You have to do the same in post and comment section also.
Set Your Timezone: After installing wordpress, your default timezone is not selected. Go to general settings and choose your time zone. So, when you schedule any
blog post, they will live according to your local time.
Permalinks Structure: By default the permalink of wordpress is short but not seo friendly.
Go to Settings > Permalink and select Post name.
Click Save.
Now you change permalink structure successfully. Now your url appears in search engine with some of your keywords which will help you to rank higher
in SERP.
Media Settings: By default WordPress generateds images of all different size like large , medium and thumbnail.
Go to Settings > Media,
Do the settings as shown in below screenshot.
Enable Browser Caching: You rarely change to your blog heavy file. So you should enable cache so that when user open blog then it cached in browser. When ever user will open
blog again then it load cached page.
It will help your blog to load faster in browsers.
Go to root folder of your blog and open .htaccess file. Add given below code there and save it.
In this way you will enable gzip compression for your blog.
## EXPIRES CACHING ##
<IfModule mod_expires.c>
ExpiresActive On
ExpiresByType image/jpg “access 1 year”
ExpiresByType image/jpeg “access 1 year”
ExpiresByType image/gif “access 1 year”
ExpiresByType image/png “access 1 year”
ExpiresByType text/css “access 1 month”
ExpiresByType text/html “access 1 month”
ExpiresByType application/pdf “access 1 month”
ExpiresByType text/x-javascript “access 1 month”
ExpiresByType application/x-shockwave-flash “access 1 month”
ExpiresByType image/x-icon “access 1 year”
ExpiresDefault “access 1 month”
</IfModule>
## EXPIRES CACHING ##
Step 9: Write Content and Promote your Blog
Congrats you have successfully setup your blog.
Start writing for your blog.
Are you thinking how to write your first blog post?
ok
So, let me help you to do so.
For creating new blog post. Just go to DASHBOARD > Post > Add New
Now a new page will open where you have to write your blog content.
You are new to blogging and you are not getting how to write awesome blog post. I am going to share important tips which will help to write posts that will grab attention.
Steps to follow for writing a blog post.
Pick a topic or Find blog post ideas – You don’t have to write about just anything. You have to find ideas which are relevant for your readers. You must
think that you chosen topic is useful to your readers or not ? If yes then proceed..
Do Keyword Research – Do keyword research your topic or idea. If you want to attract a lot of readers to your blog post through search engine, then you must create a post around specific keywords.
There are so many tools available for keyword research. You can use Google keyword planner or premium tools like Semrush, KWFinder and ahrefs to get keyword ideas.
Always look for keywords that have high search volume and low competition.
You can try long tail keywords because it easy to rank high in search engine.
Long tail keywords are those three and four keyword phrases which are very specific to your topic.
Select a main keyword (primary keyword) and two secondary keywords which you will target in your blog post.
Create an outline – It will always help you to cover all the important points in your blog post in right order.
Here is my outline structure I use to write.
Headline: Craft the headline based on the primary keyword.
Introduction: Hook – Give the readers what they are going to get if they keep reading.
Write Your Subheads: Now you have written your headline. Start structuring the blog post with subheads. Add first and second level subheads.
Try to use secondary keywords in subheads.
Process, List, Step by Step: Writing this type of content in your subheads accordingly.
Conclusion: In this section, tell about what they have learnt and convince them to implement your advice.
Write the post – Start writing your blog post by filling subheads first. Don’t start editing back while writing. Just write contents for subheads including
list, step by step guide or process.
Edit for Content – Read the whole article, make sure it connects to your readers effectively.
Posting – Now you have written your blog post, Before posting you have to keep these things in mind.
Metadata: Add meta description based on your keyword research.
Category: Choose category in which you have to publish
Tags: add tags with relevant keyword related to your main keyword.
Editing –
Grammar: check grammatical mistakes, spelling mistakes and syntax error and fix it.For this you can use tools like Grammarly which checks grammatical mistakes and suggest write words or sentences.
Post Image: create a stunning post image
Interlinking: link related article because it is good for SEO and keeping your readers for more time on your site.
Don’t think that how I will write. Just follow about tips and start writing and with time you will start getting ideas to write and your audience will love to read your words.
For getting more ideas, you can read a new article of your niche on different blog. You can also read daily newspaper to get some ideas and improve your writing style.
Step 10: Make Money Blogging
Now you have a blog and you have started to write a blog post.
Right
I am going to share some amazing ways to make money blogging which I am using for the last 7 years.
Affiliate Marketing:
Affiliate marketing is a process in which company pay you commission when sales generated from your referrals.
Affiliate marketing is the most profitable way to make money online.
In this process, you do marketing of another people of company’s products.
Let’s see the 5 steps process to get it better.
- Join Affiliate Program of a company
- Choose relevant products for your readers.
- Now you recommend a product or service to your readers or followers.
- Now follower purchase the product or service through your affiliate link.
- You get commission for the sales made using your affiliate link.
Advertising(PPC Network):
PPC is known as Pay Per Click. It is a model or process of internet marketing in which an advertiser pays a publisher(blogger or website owner) each time when the ad is clicked.
So the networks that offer pay per click on the ads are known as PPC Ad network.
Here are the steps to make money from PPC ad network.
- Apply for PPC ad network.(like adsense or media.net)
- Now you have submitted application successfully. Wait 24 hours to get reviewed. If your website meets adsense guidelines, then your account will get approved.
- Once approved, you will get a mail.
- Login to Adsense account.
- Configure ads. Choose which type of ads you want to display on your site. Create ad units.
- Copy and paste the AdSense code onto your blog.
- Verify your address using adsense pin received on your address.
- Add your bank account to get paid.
That’s all.
Now when your website visitors click on ads, you will earn. When your adsense earning reach payment threshold($100), you will get to upcoming 21th of that month in your bank account.
Offering Service:
You have started your blog, it means you have knowledge of any subject. So, this is good for generating revenue with your blog. You can offer paid services to your readers and make money blogging.
Suppose you have knowledge of digital marketing and your blog about it. In this case, you can also offer digital marketing services and get clients to use your blog.
Offering services will help you to make more money through your blog.
Selling your course/product:
Nowadays selling a course on a blog has become so popular and favorable method to make money via blogging. You can create courses related to your niche and sell them.
This is also a great way to make money blogging.
Congrats, you have started your blogging carrier.
For being a successful blogger, you have to learn so many things like SEO, blogging, and affiliate marketing.
Make a habit of reading and learning new things every day and try to implement it in your blogging business.
Also, read other blogs every day to get updated.
If you have liked this article, please share it with your friends and help them to start their own blogs.
Happy blogging 🙂
Thank you.