Python is an interpreted high-level general-purpose programming language. It was developed and launched by Guido Van Rossum in 1991.
Windows do not come with Python installed by default.
So, To write and execute Python code, first, we need to install Python on a local Machine(Our system).
What are the steps in installing Python?
Here are the following steps to install Python. Follow this step-by-step and you can easily install and set up Python in your system.
STEP 1: Select the Version of Python to Install
First of all, visit Python official site and download the Python.exe install file and run it on your system.
There are different versions of Python available.
If you are going to work on an older project then choose the Python version according to it. But if you are going to start coding a project from scratch then you are free to choose a version.
Choose the latest version of Python 3
STEP 2: Download Python Executable File.
Click here to visit the official Python website downloading section. https://www.python.org/downloads/
All the available versions of Python are listed there. Select the required version and click on the download button.
On clicking download, various available executable files will be visible for different operating systems.
Now choose the version as per your system and download the installer file in your system.
STEP 3: Run Executable Installer
We have successfully downloaded the Python 3.10.0 Windows 64 installer file.
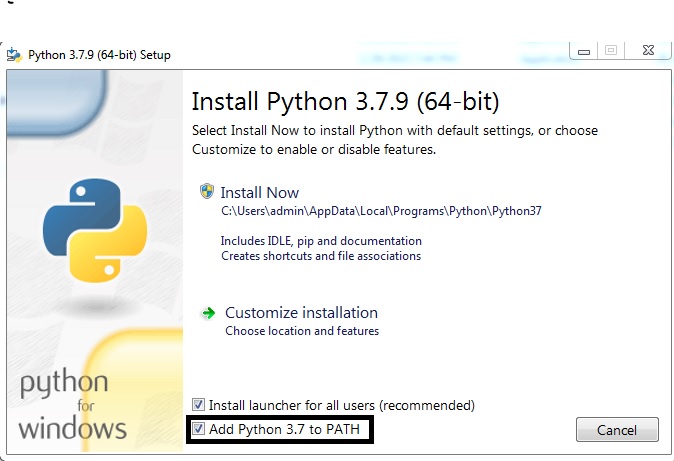
- Run the Python Installer.
- Make sure you select the install launcher for all users and Add Python 3.11 to the PATH checkboxes.
- Click on the Install Now button.
- On clicking Install Now, the installation process starts.
- Once the installation process is completed, the following screen will be seen.
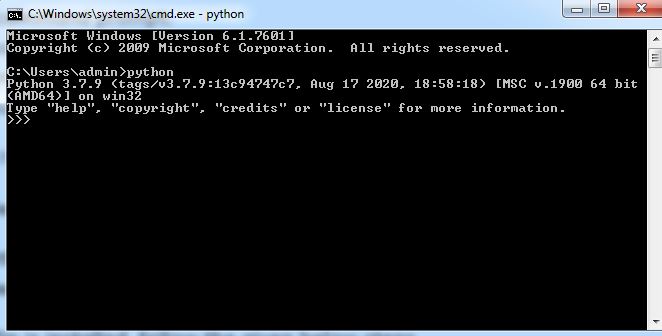
STEP 4: Verify Python is Installed on Windows.
Open the command prompt.
Type ‘python’ and press enter.
The version of Python you have installed on your system will be displayed if Python is successfully installed on your windows.
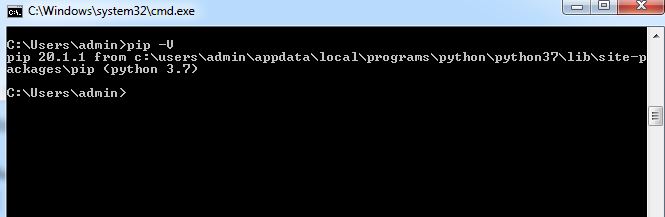
STEP 5: Verify Pip is Installed
Pip is a Python package manager for Python software packages. Make sure you installed it on your system.
To verify Pip is installed, follow the given below steps.
- Open the command prompt.
- Enter pip -V
- If Pip is installed successfully then the following output will be displayed.
Conclusion:
In this Python tutorial, You have learned How To Install Python 3 on Windows 10 step by step. If you have any questions related to this tutorial, feel free to ask in the comment section.