In this tutorial we will see how to write your first blog post in WordPress. I have written many article related to wordpress but this is basically for beginners to guide them. Newbie bloggers or beginners is generally feel confused about how to start the process of writing first blog post in WordPress.
I am writing this blog post to guide beginners with step by step process that will help them to write first blog post easily. Let’s start.
How To Add Dynamic Widget Areas in the WordPress Footer
Steps By Step Guide to Write and Publish Your First Blog Post:
Step 1.
First of all Access your WordPress Admin Panel.
Go to yourdomainname.com/wp-admin
Step 2.
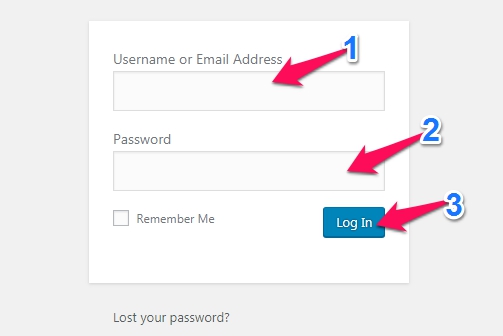
Login with credentials.
-
- Enter Username or Email Address.
-
- Enter password
- Click on Login button.
Step 3.
Now you will get redirected to WordPress dashboard after logged in.
-
- Click on Posts.
- Click on Add New option.

Step 4.
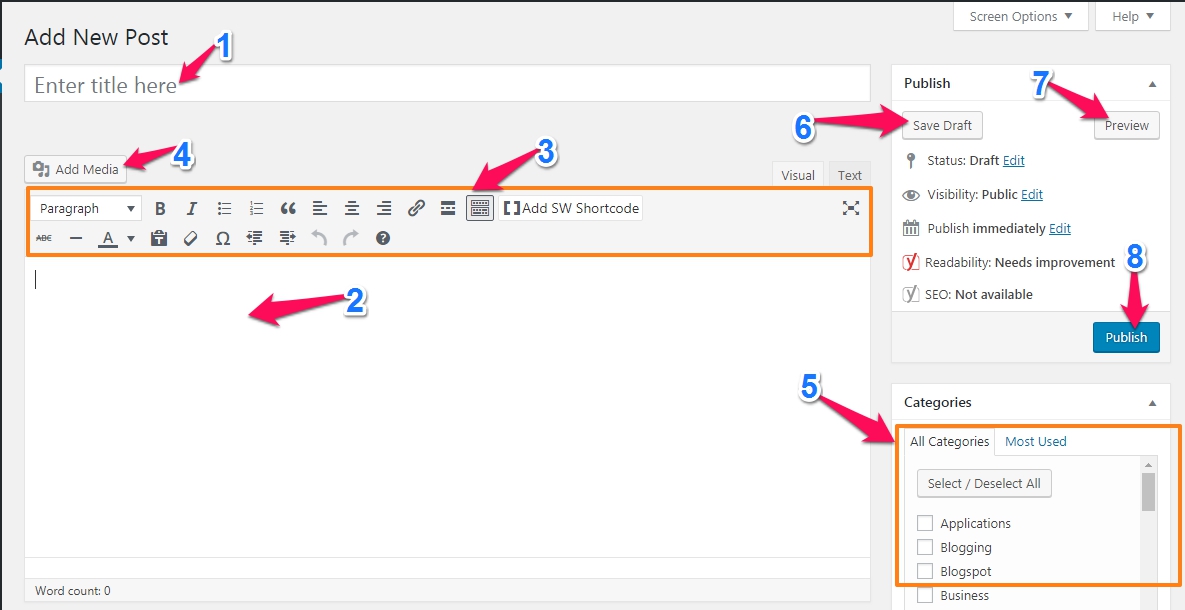
Now you will get this add new post page as shown below.
-
- Write your Post Title in place of “Enter title here”.
-
- Write your post content.
-
- Set your content paragraph and style with given options.
-
- Click on “Add Media” button to add post image.
-
- Select “Categories” in which you want to add the post.
-
- If you don’t want to want to publish your first blog post at this time , then click on “Save draft” button to save it.
-
- Click on “Preview” button to check how your published post will display on your blog.
- Confirm your all details and then click on “Publish” button to publish your post.
That’s all.
Now your first blog post will displaying on your blog. Refresh your blog page with CTRL+F5 command to refresh webpage cache and see published post. if you have any query regarding this article, feel free to comment.