If you are running a blog, the website loading speed is an important factor for better search engine ranking. Slow website loading gives a bad experience to the user and may be user quit your blog page. WordPress blog speed is increased using an image optimized plugin and cache plugin with a content delivery network. Google also declares that website which load faster will have good in search engine rank.There are many content delivery network available but MAXCDN is best and mostly used. In this article we will see how to setup cloudflare CDN on wordpress blog or website.
What is CloudFlare CDN?
CloudFlare CDN is a distributed server, web apps firewall and content delivery network. The use of cloudflare gives high performance by distributing service separately to the user based on their geographic location. Usage of cloudflare decreases the server load and increase the website loading speed. It also helps your blog to secure from attackers. Now at this time the basic plan of CloudFlare is free. CloudFlare is CDN which works like proxy server between website and visitors.Let us see how to setup CloudFlare CDN in WordPress Blog.

Steps to Setup Free Cloudflare CDN for Your WordPress Blog
Now we are going to see how to setup CloudFlare CDN for WordPress blog or website to improve the website speed and its security much better. Follow the given below steps.
Step 1.
- Now we have to go official site of CloudFlare and click on signup button to create an account.
- Select Free plan.
- Enter your email and password.Click on Create Account button.

Now account create successfully.
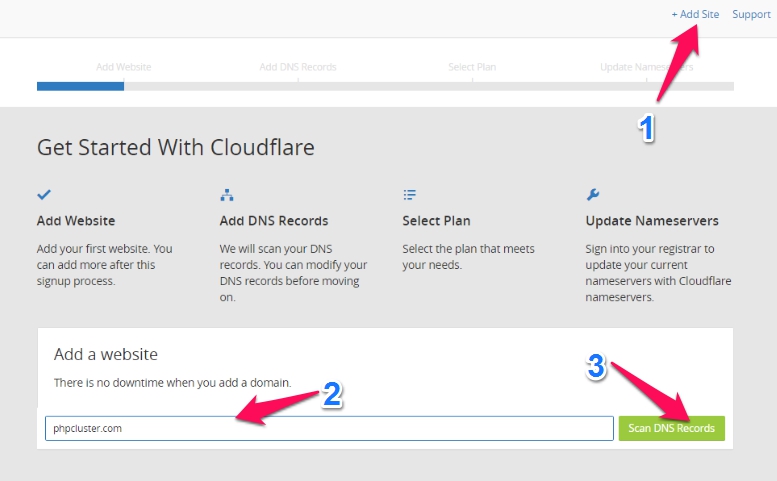
Step 2. Add Websites
Write website domain name and click on Scan DNS Record to proceed to next step. This will take some to scan.
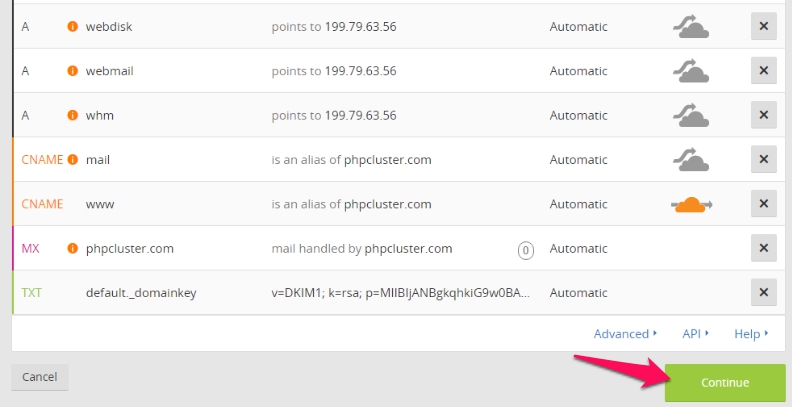
Step 3. Verify DNS Records
When DNS record is scanned successfully then DNS detail of your domain will be displayed.Click on Continue button to proceed.

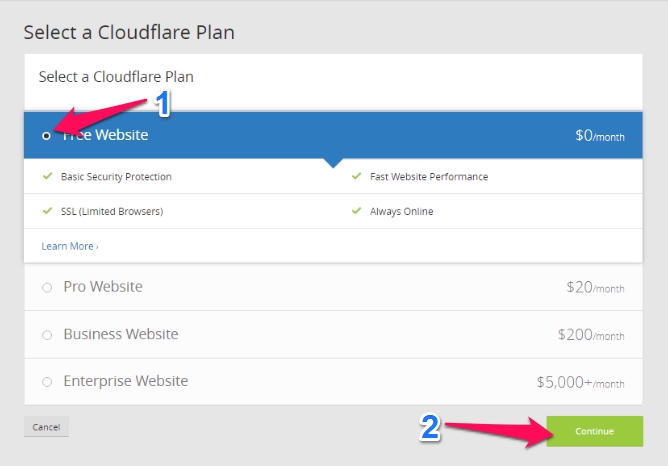
Step 4. Choose CloudFlare Plan
List of cloudflare DNS plan will be display. Select Free Website option and click on Continue button.
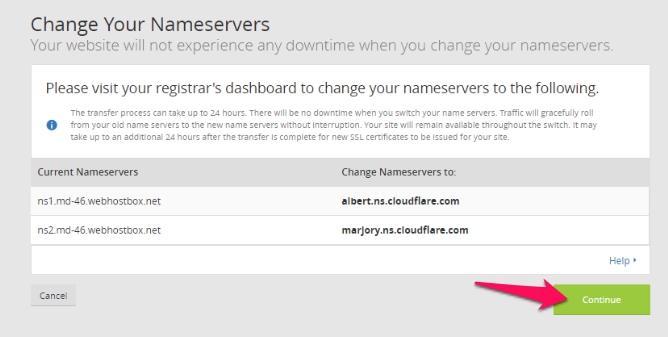
Step 5: Change Your Domain Nameserver To CloudFlare
Now login to your domain registrar website and update your current domain nameserver to cloudFlare nameserver as given below. 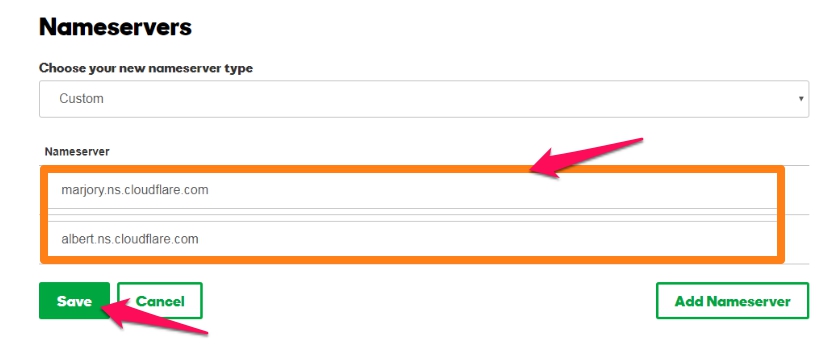
Then click on Continue button.
It take some time to make active CDN on your website. Sometime it takes upto 24 hours to propogate your nameserver to cloudFlare successfully.
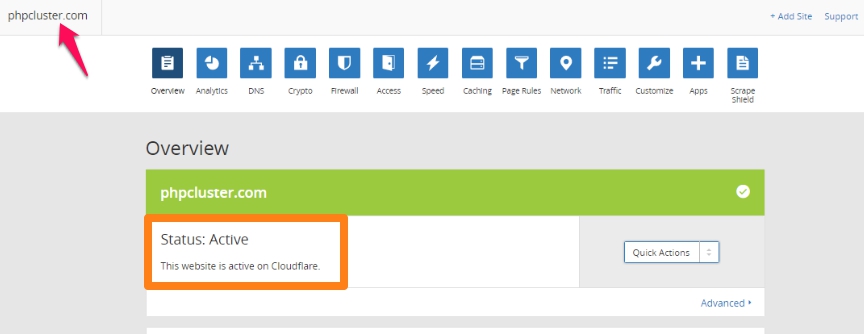
After some time click on your website name and you will get CloudFlare DNS status is active now. Same steps is need to follow for static or dynamic website also. That’s it now CloudFlare CDN is successfully set up on your website.